
Phone Book (Menu 1)
To access Menu 1, press MENU then OK.
Find Entry (Menu 1 1)
After you select this item, the
phone prompts you to enter a
name. Enter the first letter(s)
of the name then press OK
(or
"or
to scroll through
the stored entries).
Alternatively, at the Name: prompt, just press
.
Save Entry (Menu 1 2)
With this menu item, the phone prompts you to
enter a name and number. At each prompt, enter
the information requested then press OK. When
the phone asks you to Save in Location, press
OK, or enter another location number then press
OK. The phone displays SAVED and the remaining
available memory.
Note: See "The Phone Book" on page 23 for more
information about saving entries.
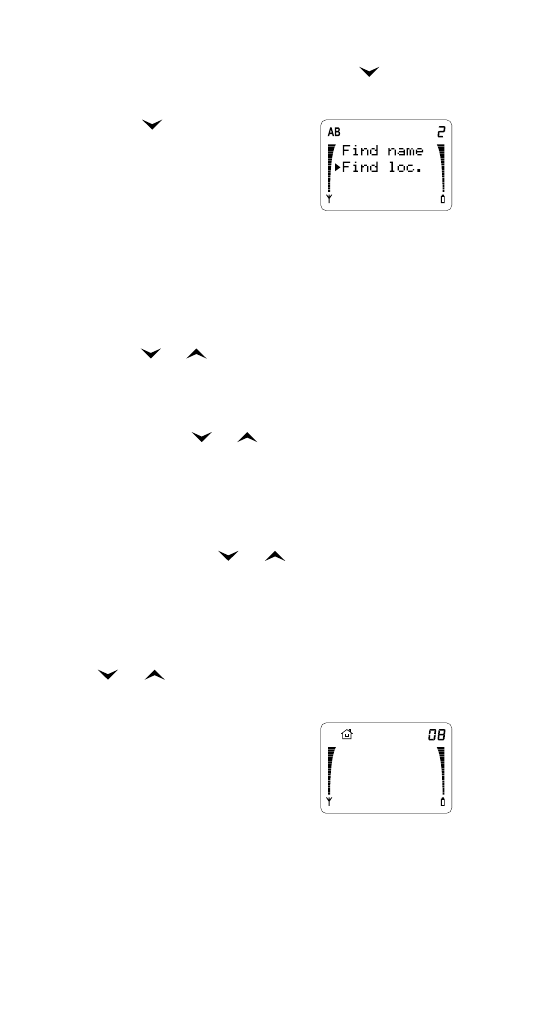
Edit Entry (Menu 1 3)
1 Either:
Recall the entry from the Phone Book first,
then go to step 4 on the next page.
32
32
32
32
Menu features
Or:
Press MENU then OK. Then press
to scroll
to EDIT ENTRY. Press OK.
2 Press
to scroll to Find
Name or Find Loc., then
press OK.
3 Either:
If you selected Find
Name, enter the first letter of the name, then
press OK.
Or:
If you selected Find Loc., enter the location
number (1-75) where the entry is stored (or
press
or
to scroll entries), then press OK.
4 The entry is displayed.
If this is the entry you want to edit, press OK;
if not, press
or
to scroll to the entry you
want to edit, then press OK.
5 Edit Name: (see note after Step 7) and the
name (if it exists) is displayed. If you want to
edit the name, use the CLR key to erase
characters, use
or
to move the cursor,
and enter new characters as required. Press OK.
6 Edit No.: (see note after Step 7) and the
number is displayed. If you want to edit the
number use the CLR key to erase digits, use
or
to move the cursor, and enter new
digits as required. Press OK.
7 At SAVE IN LOCATION?
(you can enter a different
location number if you
want) press OK. If you did
not change the name, or
the name you have entered matches one
already stored, then REPLACE? will be
displayed; press OK to replace the contents
with the new (edited) name and number.
REPLACE?
33
33
33
33
Menu features
Note: The prompts Edit Name: and Edit No.: are
omitted if the name or number occupies more than two
lines on the display.
Erase Entry (Menu 1 4)
Note: Be careful when erasing--it can’t be undone!
In this menu, if you choose
Erase All, the phone asks you
to confirm. Press OK when
you see ARE YOU SURE?, or
press CLR to exit without
erasing.
If you choose One by One, the phone displays
Erase name:. Either enter the first few letters of
the name then press
, or just press
to scroll
through stored entries. When you see the entry
you want to erase, press OK, or press CLR if you
change your mind and do not want to erase.
Phone Book Status (Menu 1 5)
Use this menu item to see the
percentage of memory avail-
able in the Phone Book.
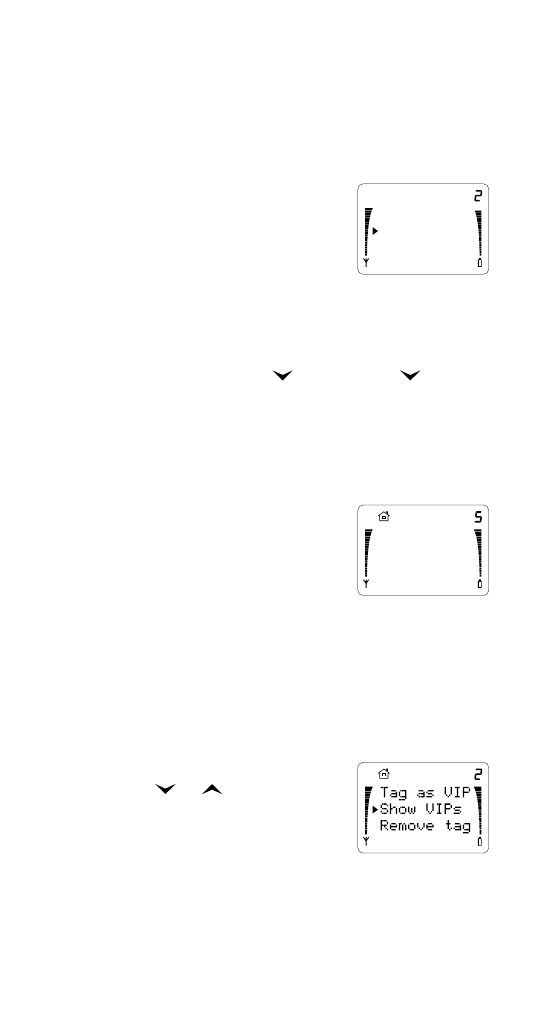
VIP List (Menu 1 6)
Using this menu, you can make any Phone Book
entry a VIP number (by tagging it), show VIPs,
and remove VIP tags. For more details about this
feature, see “Using the VIP feature” on page 28.
Note: The name or number you want to tag or untag
must already be stored in the Phone Book.
If you choose Tag as VIP:
Press
or
to select Find
name or Find Loc. then press
OK.
At the Find name: prompt,
enter the first letter(s) of the name, or at the
Find loc: prompt, enter a one-digit or two-digit
AB
ABC
One by One
Erase all
n% OF
MEMORY
AVAILABLE

34
34
34
34
Menu features
number. Press OK. If necessary, press
or
to
scroll to the entry you want, then press OK.
TAGGED will be displayed briefly, and you will
hear a demonstration ‘fanfare’ ringing tone.
If you choose Show VIPs:
Press
or
to scroll the Phone Book entries
currently tagged as VIP numbers.
If you choose Remove tag:
Press
or
to scroll to the entry you want to
untag, then press OK. TAG REMOVED will be
displayed briefly.
The tagged VIP numbers will be numbered ‘t1’ to
‘t3’ (index number). If you untag an entry,
remaining tagged entries may be renumbered.
If you attempt to enter a fourth VIP number, you
will see the message VIP LIST FULL. If this happens,
remove an existing tag before adding a new tag.